系统安装
文档维护:Arvin
网页部署:Arvin
▶
写在前面:Ubuntu20.04和Windows系统安装教程
vectory系统盘制作
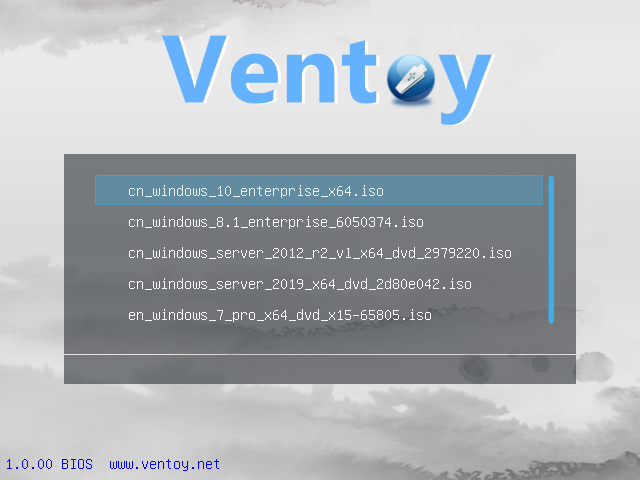
Ubuntu安装教程
软件安装
搜狗拼音
参考链接:
安装fcitx
1
2
sudo apt install fcitx-bin
sudo apt-get install fcitx-table下载搜狗安装包
安装依赖
1
2
sudo apt install libqt5qml5 libqt5quick5 libqt5quickwidgets5 qml-module-qtquick2
sudo apt install libgsettings-qt1安装搜狗
1
2
cd ~/Downloads/
sudo dpkg -i sogoupinyin_4.2.1.2800_x86_64.deb # 依照自己的文件名字确定切换fcitx
在系统设置
Settings中选择region and languages,点击Manege installed language。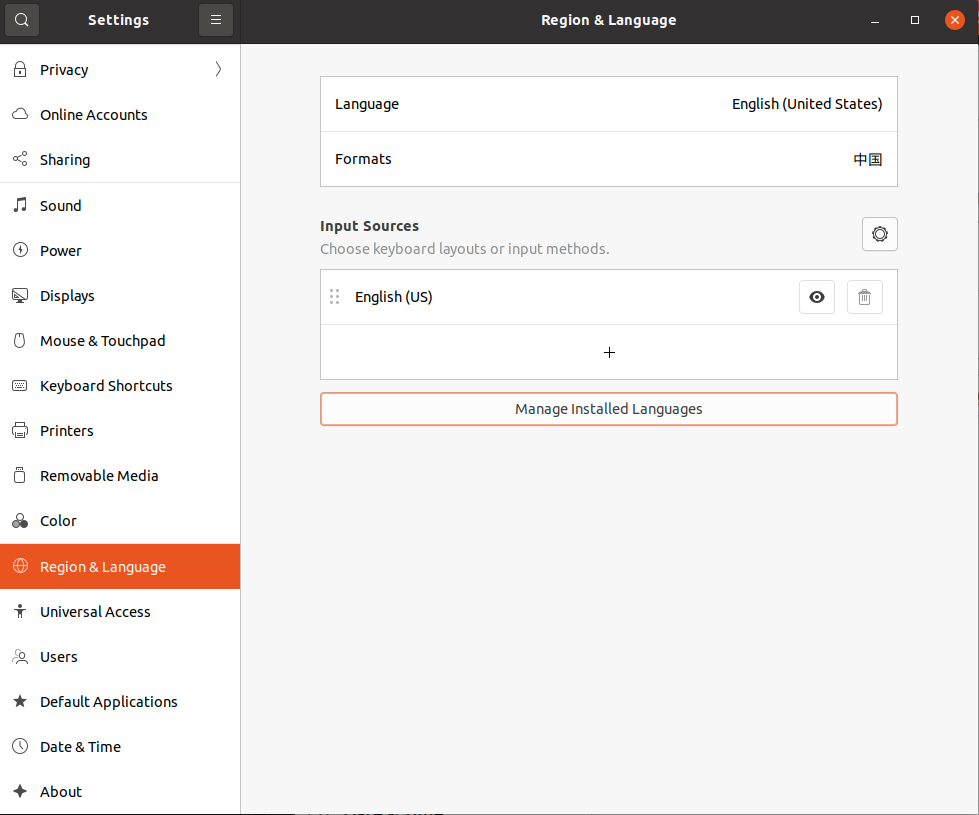
先把下面选fcitx,然后点击Apply System-Wide。
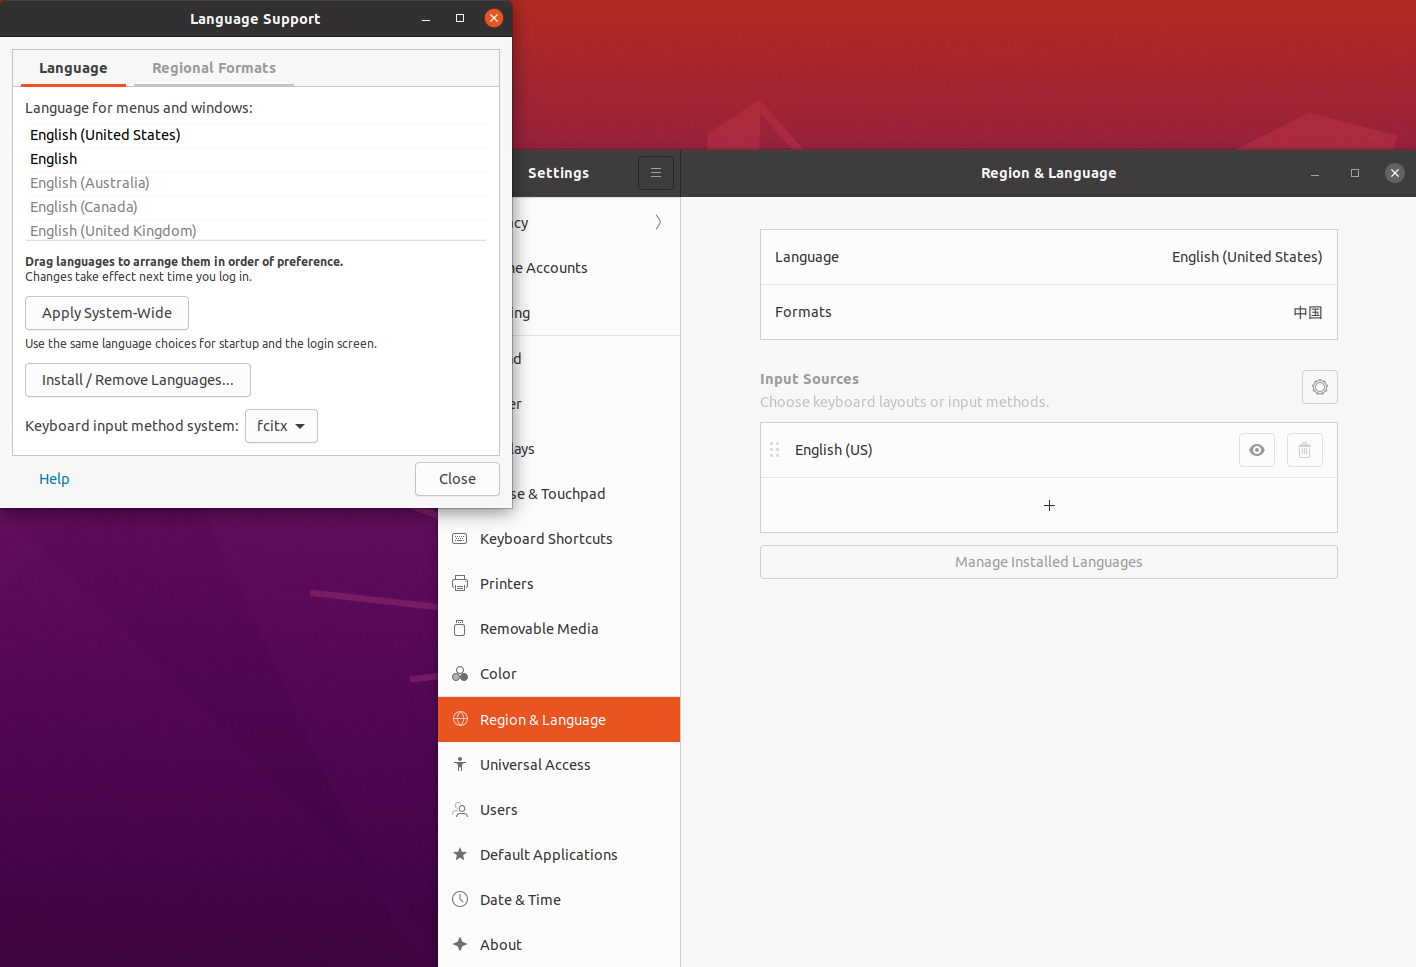
重启电脑
右上角点击
Confighre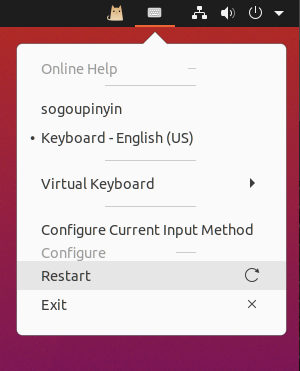
点击$+$号
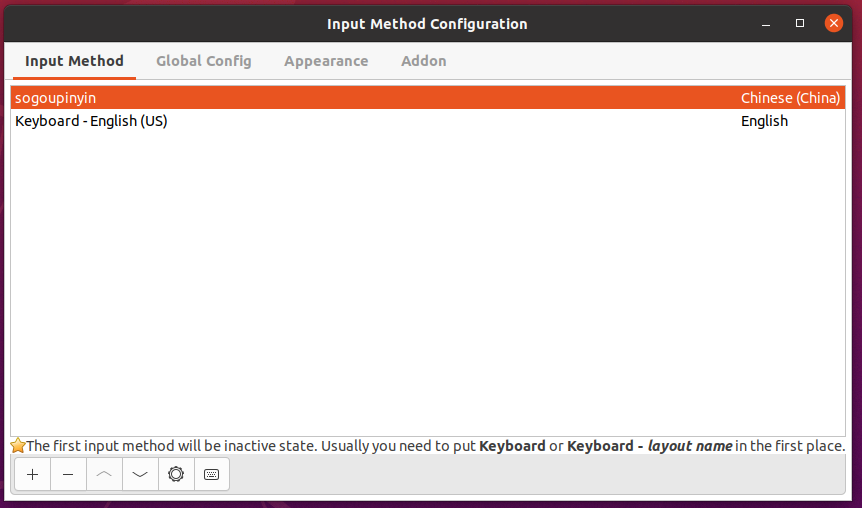
搜索sougou
取消勾选
Only show ...,然后搜索sogou。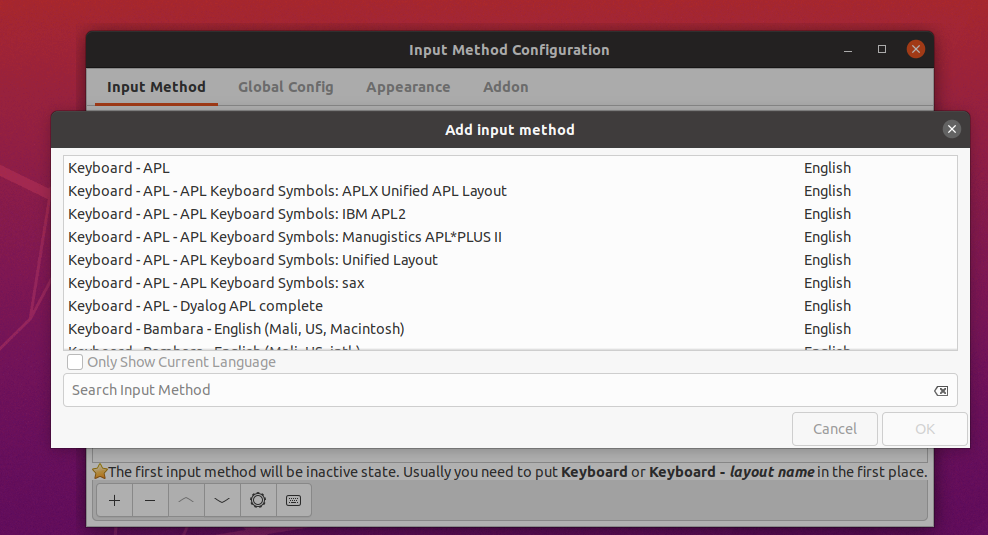
搜选sogou
选中sogoupinyin,移到输入法首位
typora
参考链接:
安装
1
2
3
4
5
6
7or run:
sudo apt-key adv --keyserver keyserver.ubuntu.com --recv-keys BA300B7755AFCFAE
wget -qO - https://typoraio.cn/linux/public-key.asc | sudo tee /etc/apt/trusted.gpg.d/typora.asc
add Typora's repository
sudo add-apt-repository 'deb https://typoraio.cn/linux ./'
sudo apt-get update
install typora配置
在获取主题页面下载喜欢的主题,下载
.zip文件并解压。在 Typora 中,打开“偏好设置”(
File>Preferences)。然后切换到“外观”选项卡并单击“打开主题文件夹”按钮。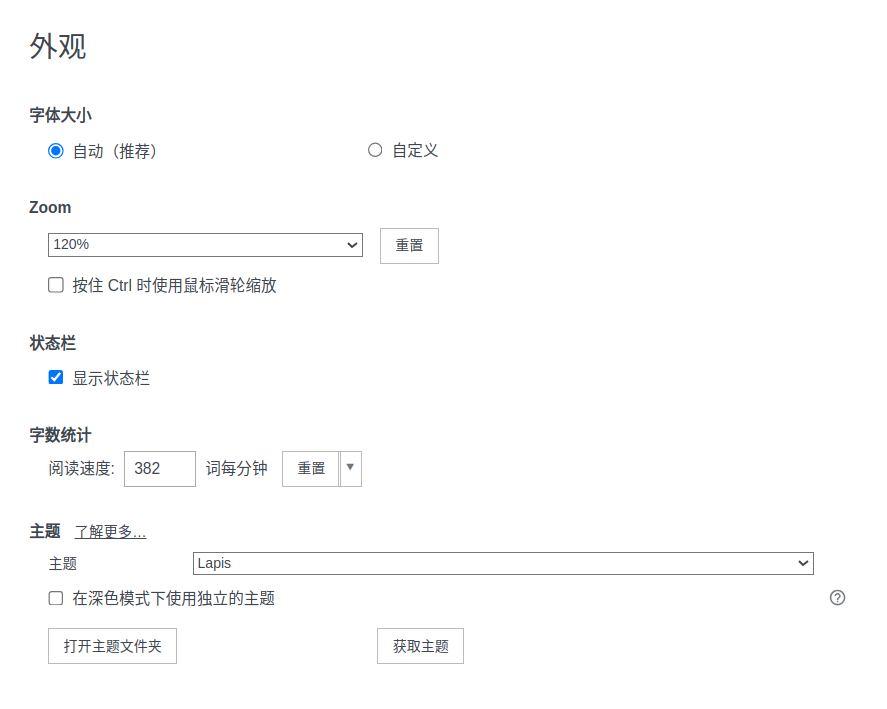
将
.css文件和主题文件夹复制到 Typora 的主题文件夹中。重新启动 Typora 并从主题菜单中选择相应的主题。
clash
参考链接:
下载clash for windows,选择linux版本。(我下载的是Clash.for.Windows-0.19.12-x64-linux.tar.gz)
找到下载文件,执行如下命令
1
2
3
4
5
6
7
8
9
10
11
12
13
14
15
16
17
18
进入下载目录(默认情况是下载到 ~/Downloads 目录,如果不是请进入到对应的下载目录)
cd ~/Downloads
解压
tar -zxvf Clash.for.Windows-0.20.22-x64-linux.tar.gz
重命名
mv Clash.for.Windows-0.20.22-x64-linux clash
进入clash目录
cd clash
执行cfw命令,即可打开clash界面
./cfw创建clash应用程序
1
2
3
4
5
6
7
8
9
10
11
12
13进入用户应用程序目录
cd ~/.local/share/applications
创建clash应用程序
touch clash.desktop
将以下代码粘贴到 clash.desktop 文件(Icon是应用程序图标,可以自行在网络下载,然后引入即可,比如我将下载的图标 clash.png 放到 ~/Documents 目录下面)
[Desktop Entry]
Name=clash for windows
Icon=~/Documents/clash.png
Exec=~/Downloads/clash/cfw
Type=Application
添加可执行权限
chmod +x clash.desktop
上面步骤操作完成,如果看不到应用程序图标,可以尝试注销用户或者直接搜索 clash终端使用clash代理
clash启动后,如果想要在终端使用clash,可以直接使用 export ,如下:
1
2
3
4
5
6
7
8
9
10
11在终端使用代理
export http_proxy=http://127.0.0.1:7890
export https_proxy=http://127.0.0.1:7890
测试代理可用
curl -i google.com
在终端取消代理
unset http_proxy
unset https_proxy
更优雅的方式设置/取消终端代理,执行下面两行代码后,可以直接在终端使用 proxy/unproxy 来设置/取消 终端代理
echo 'alias proxy="export http_proxy=http://127.0.0.1:7890;export https_proxy=http://127.0.0.1:7890' >> ~/.bashrc
echo 'alias unproxy="unset http_proxy;unset https_proxy"' >> ~/.bashrc
1 | 下载安装包 |
vscode
- 官网下载安装包
- 安装
1 | sudo apt install ./code_1.67.0-1651667246_amd64.deb |
Latex
参考链接:
命令行安装
安装
安装latex发行版TeX Live
1
sudo apt-get install texlive-full
安装XeLatex编译引擎
1
sudo apt-get install texlive-xetex
安装中文支持包,使用的是xeCjK
1
sudo apt-get install texlive-lang-chinese
安装图形化界面
1
sudo apt-get install texstudio
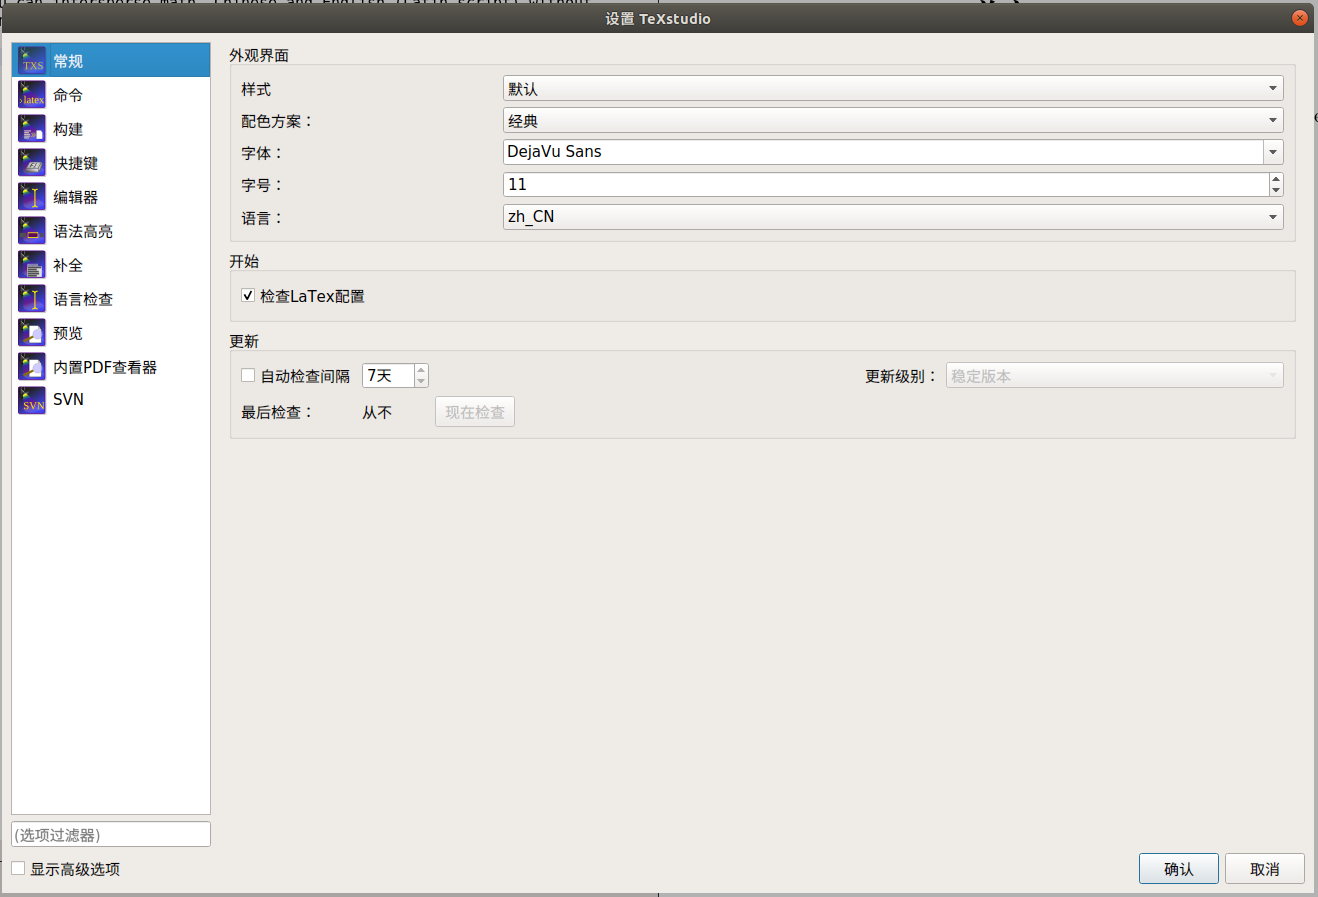
配置
设置中文
Options->Configure TeXstudio->General->Language更改为zh-CN即可
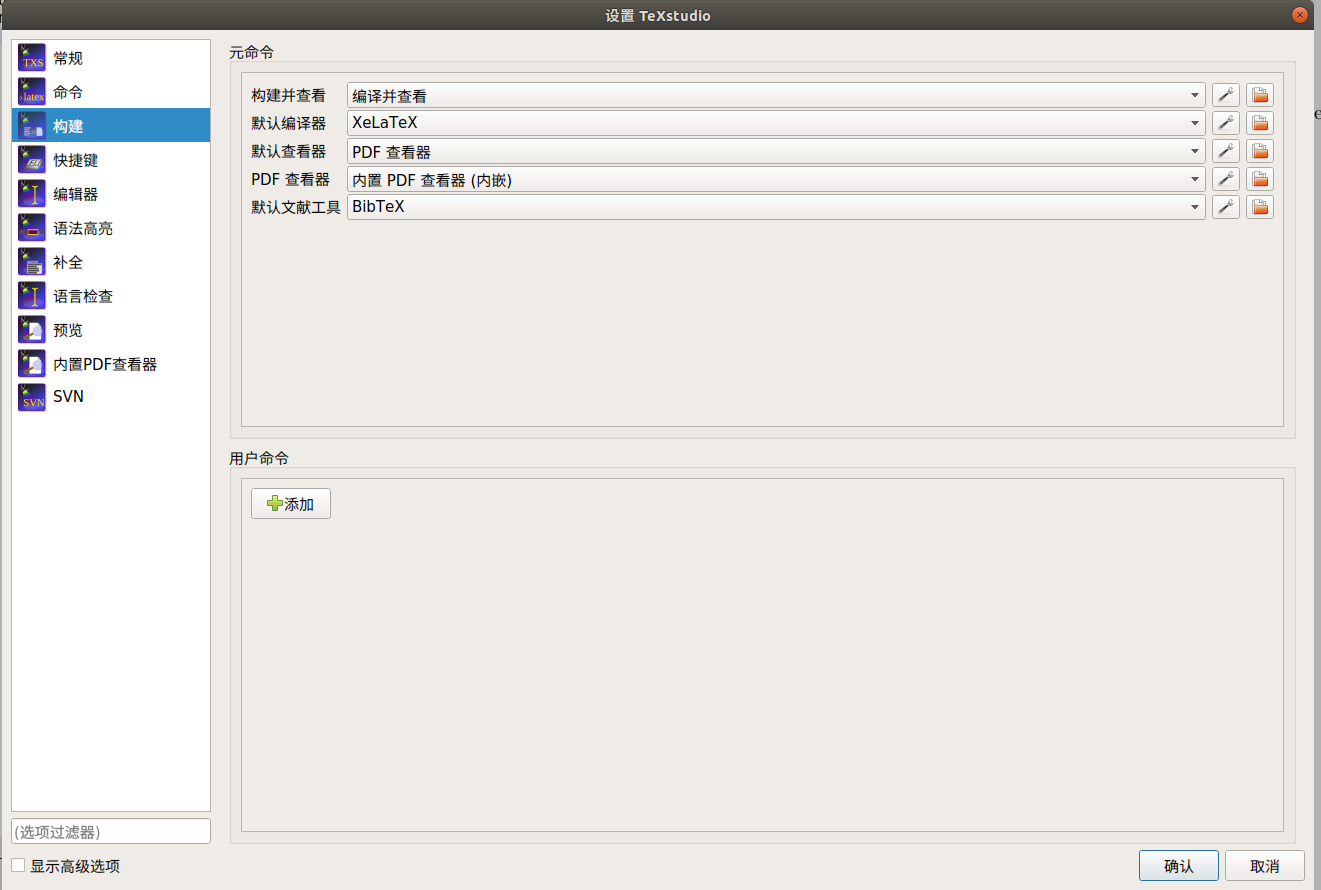
设置中文编译器,默认编译器设置为XaLaTex
测试
新建文本,输入以下内容:
1 | \documentclass{article} |
按F5进行编译
源码安装
- 创建挂载点
1 | sudo mkdir /mnt/cdrom |
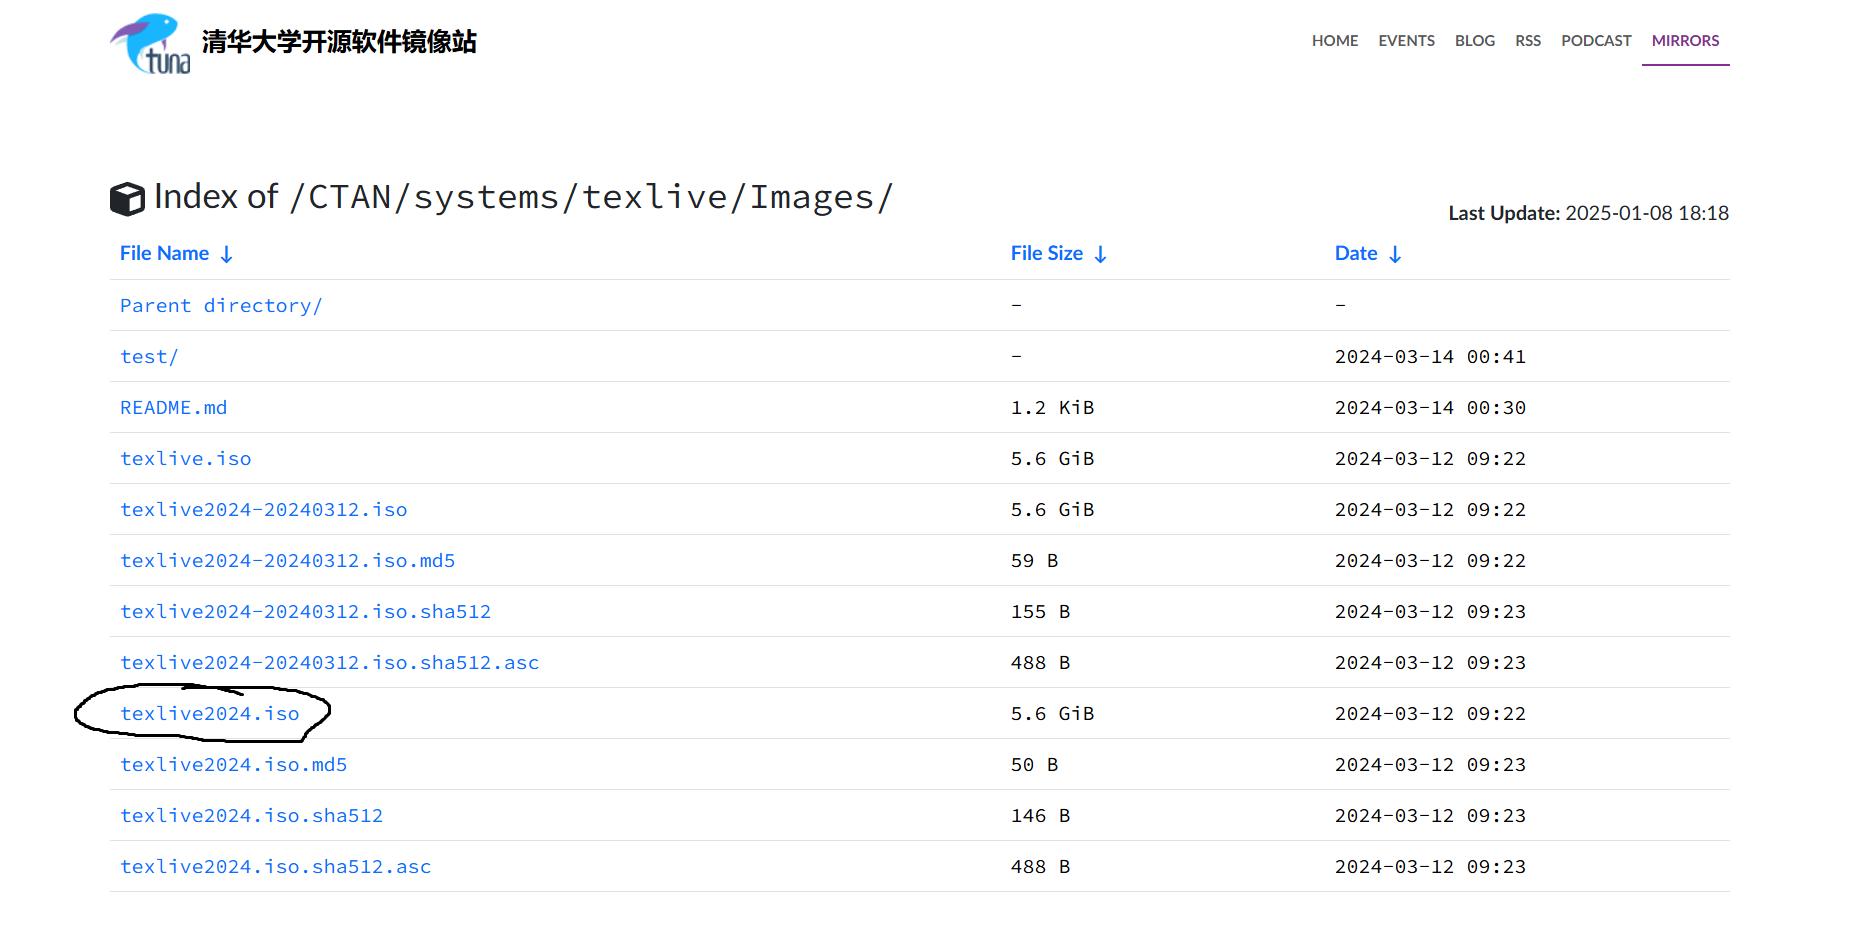
挂载下载到的 texlive.iso 文件到挂载点
1
sudo mount -o loop ./texlive.iso /mnt/cdrom
cd 到挂载目录
1
cd /mnt/cdrom
使用 root 权限安装 TexLive
1
sudo ./install-tl
安装完 TeXLive 后要及时卸载挂载的镜像,方便以后挂载其他镜像文件
1
sudo umount -v /mnt/cdrom
设置环境变量
1
sudo gedit ~/.bashrc
插入:
1
2
3export MANPATH=${MANPATH}:/usr/local/texlive/2024/texmf-dist/doc/man
export INFOPATH=${INFOPATH}:/usr/local/texlive/2024/texmf-dist/doc/info
export PATH=${PATH}:/usr/local/texlive/2024/bin/x86_64-linux然后
1
source ~/.bashrc
安装字体库(宋体)
1
2cd /usr/share/fonts
mkdir chinese将本地C:\Windows\Fonts字体文件拷到chinese文件夹下,注意将 ttc后缀改成ttf
1
sudo mv ~/02_study/Fonts /usr/share/fonts/chinese/
执行下列命令查看是否成功
1
fc-list | grep "SimSun"
goldendict
1 | sudo apt-get install goldendict |
环境配置
更换清华源
miniconda
关闭默认进入base
1 | conda config --set auto_activate_base false |
添加镜像源
1 | 添加镜像源 |
ros
opencv
Ubuntu自带的opencv版本是4.x,现在安装3.x的版本
https://blog.csdn.net/qq_42257666/article/details/125673177
显卡驱动
参考链接:
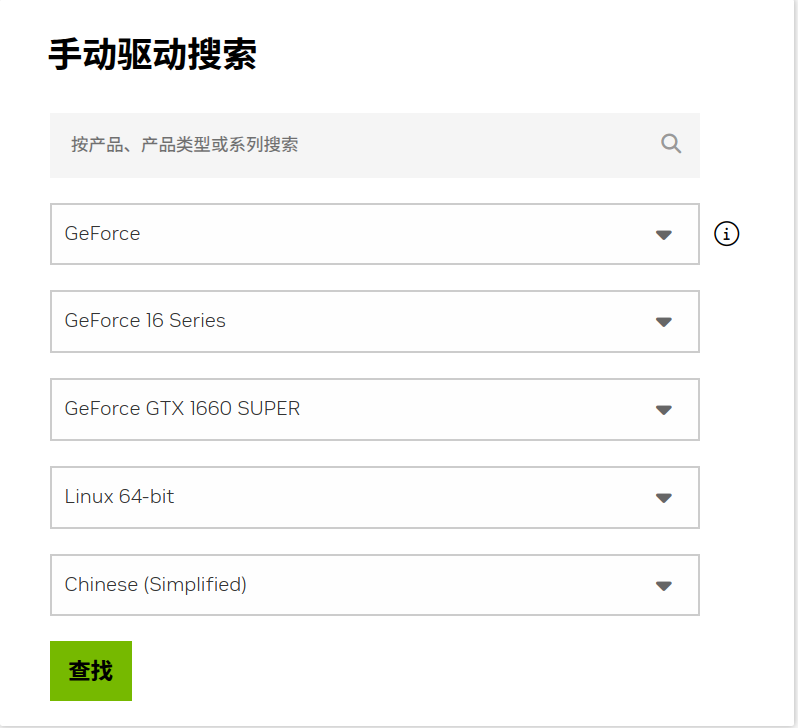
官网下载对应显卡版本驱动(不用下载最新的可能兼容性有问题)
更新软件列表和安装必要软件、依赖(有就没必要装了)
1
2
3
4
5
6
7sudo apt-get update
sudo apt-get install g++
sudo apt-get install gcc
sudo apt-get install make禁用默认驱动
在安装NVIDIA驱动以前需要禁止系统自带显卡驱动nouveau。
1
2
3
4
5
6
7
8
9
10
11新建一个blacklist-nouveau.conf文件
cd /etc/modprobe.d
sudo touch blacklist-nouveau.conf
sudo vim blacklist-nouveau.conf
打开文件末尾输入保存
blacklist nouveau
options nouveau modeset=0
更新系统的initramfs镜像文件
sudo update-initramfs -u上述步骤完成后,重启电脑。在终端输入:
1
lsmod | grep nouveau
如果没有输出的话就说明禁用了nouveau。
进入tty模式
这一步需要关闭图形界面,需要使用另一个设备阅读。
关闭图形界面进入tty模式
1
sudo telinit 3
输入如下命令可以重新打开图形界面
1
sudo telinit 5
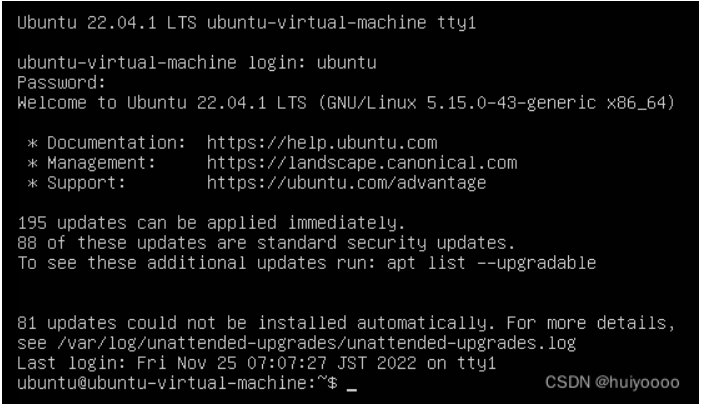
进入tty以后需要输入用户名和密码登录
输入用户名和密码后,出现这个画面就是登录成功了。
禁用X-window服务
输入命令
1
sudo service gdm3 stop
安装驱动
1
2
3
4
5
6进入存放驱动文件目录
cd ~/Downloads/
添加权限
sudo chmod 777 NVIDIA-Linux-x86_64-525.53.run
安装
sudo ./NVIDIA-Linux-x86_64-525.53.run –no-opengl-files -no-x-check安装时会出现选项
Install Nvidia’s 32-bit compatibility libraries?
选择 “No”Would you like to run the nvidia-xconfig utility to automatically update your X configuration file so that the NVIDIA X driver dill be used dhen you restart X? Any pre-existing X configuration file will be backed up.
选择 “Yes”
返回图形界面
1
2
3
4再次启动X-window服务
sudo service gdm3 start
返回图形化界面打开终端输入
nvidia-smi其他问题
进入tty模式如果不是英语系统可能会出现乱码
输入以下命令:1
2export LANG="UTF-8"
export LANGUAGE="UTF-8"返回图形界面黑屏
检查hdmi线是不是接在主板的hdmi接口上了,接到显卡上就可以了。
cuda和cudnn
参考链接:
https://blog.csdn.net/weixin_37926734/article/details/123033286
推荐runfile文件安装
cudnn安装
1 | wget https://developer.download.nvidia.com/compute/cuda/repos/ubuntu2004/x86_64/cuda-keyring_1.1-1_all.deb |
Windows安装教程
软件安装
latex
参考链接:
安装latex环境
安装texlive
从链接下载
双击
install-tl-windows.bat安装- 修改安装路径,不要安装在C盘,不要安装在中文路径下
点击左下角Advanced,选择Customize,选择安装的语言包英语和中文即可
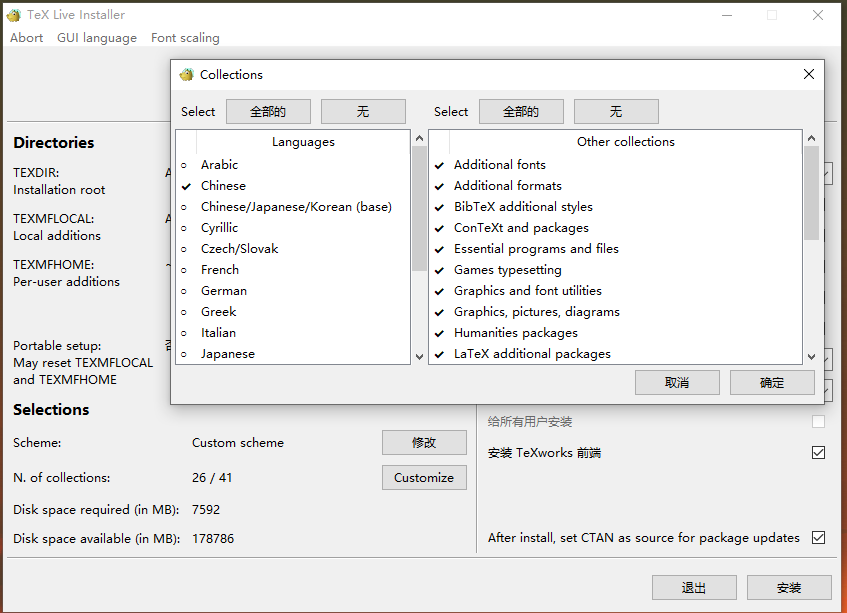
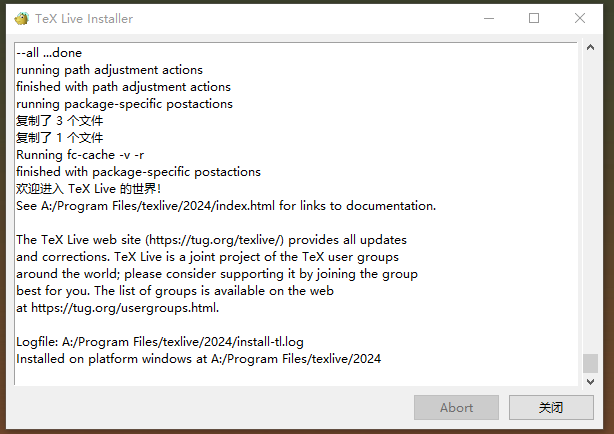
然后点击安装即可,安装时间比较久,出现以下界面即表示安装成功。
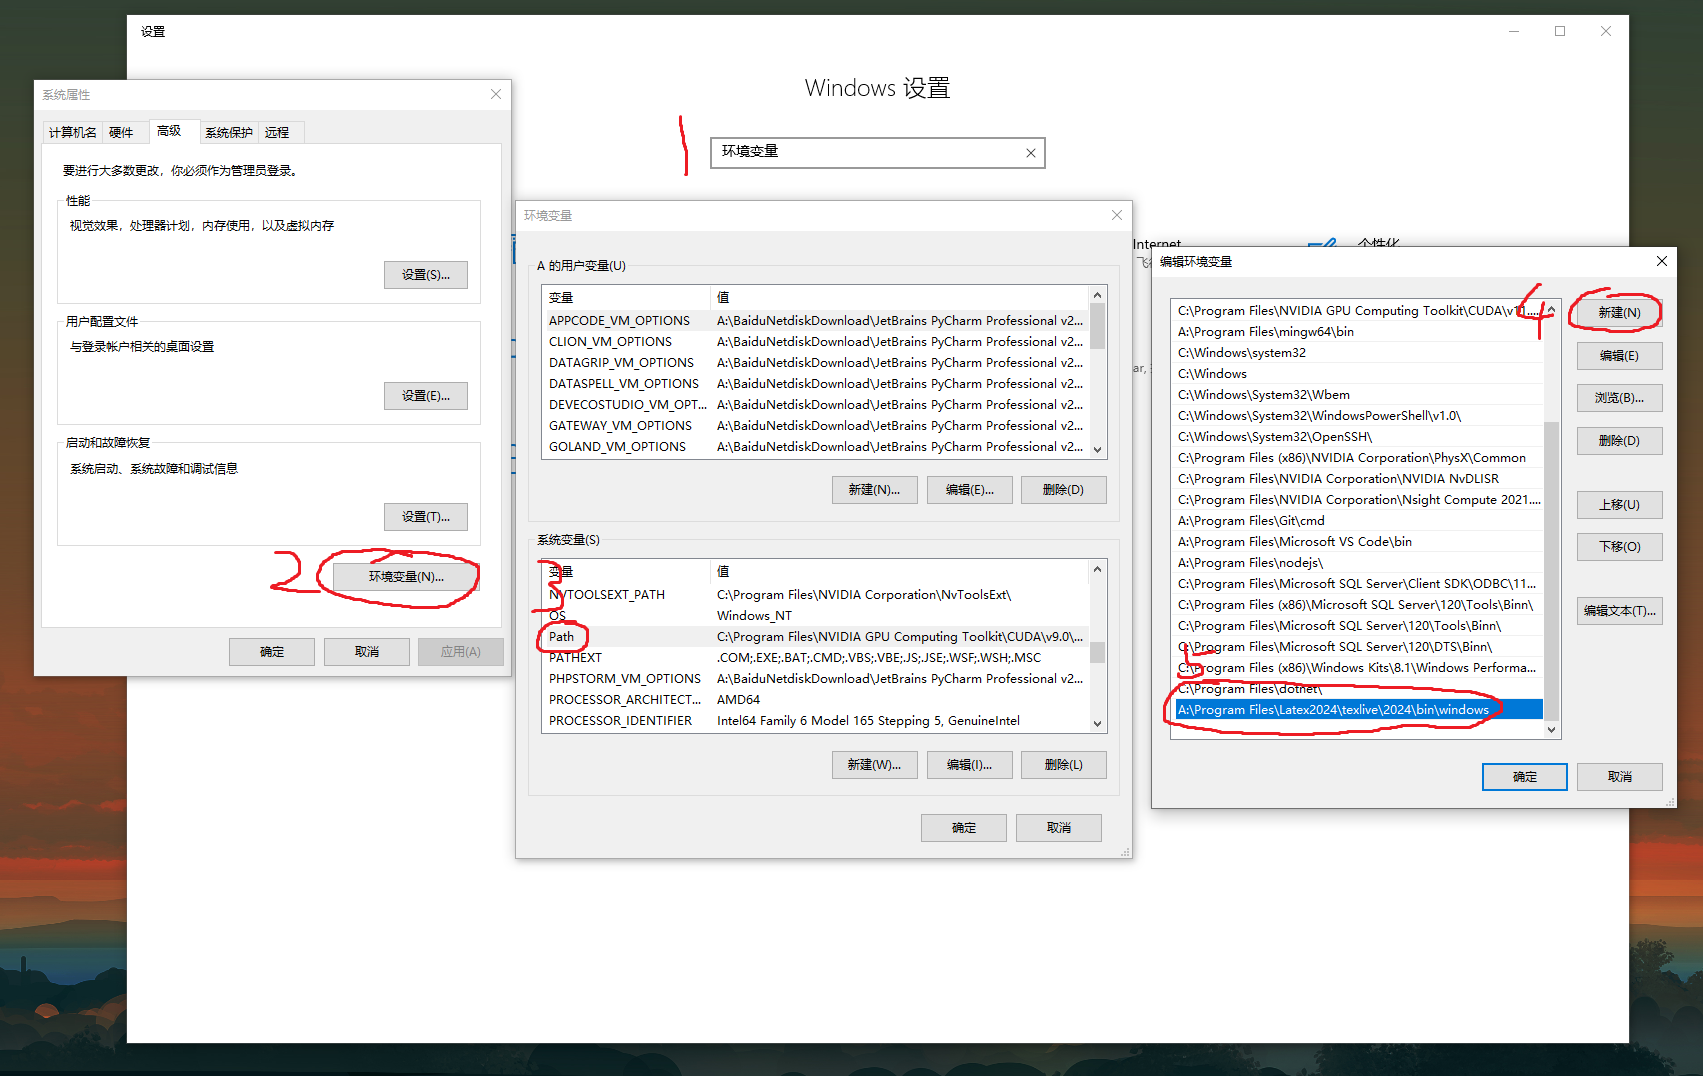
配置环境变量
在系统环境的path里面加上texlive的安装路径,~\LaTex\texlive\2023\bin\windows
在控制台输入下面语句,若出现版本则说明安装成功。
1
latex -v
安装texstudio
下载链接
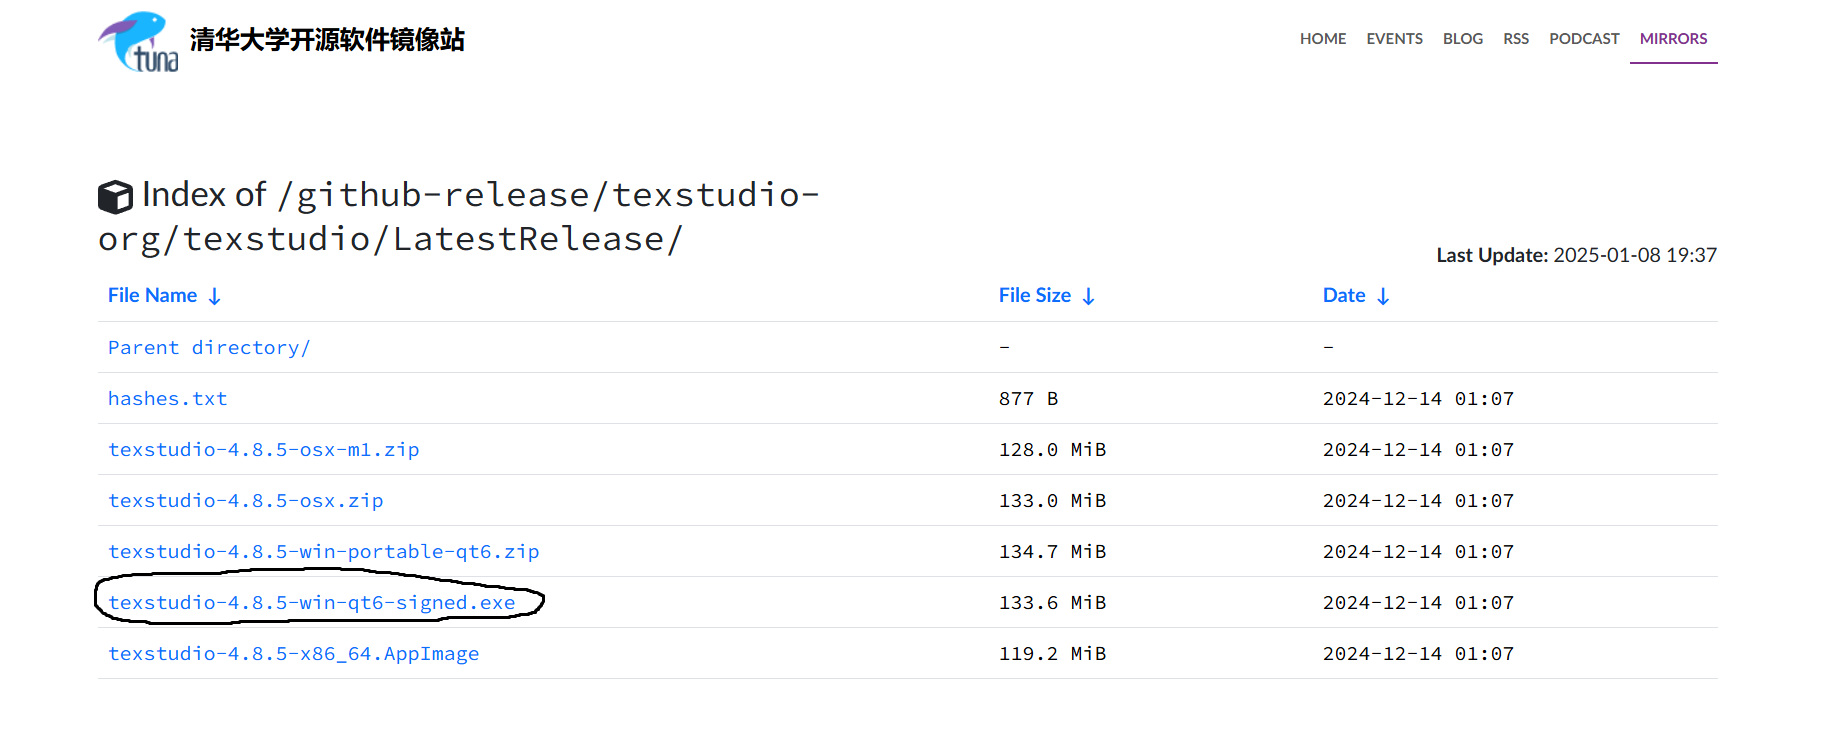
更改安装位置安装即可。
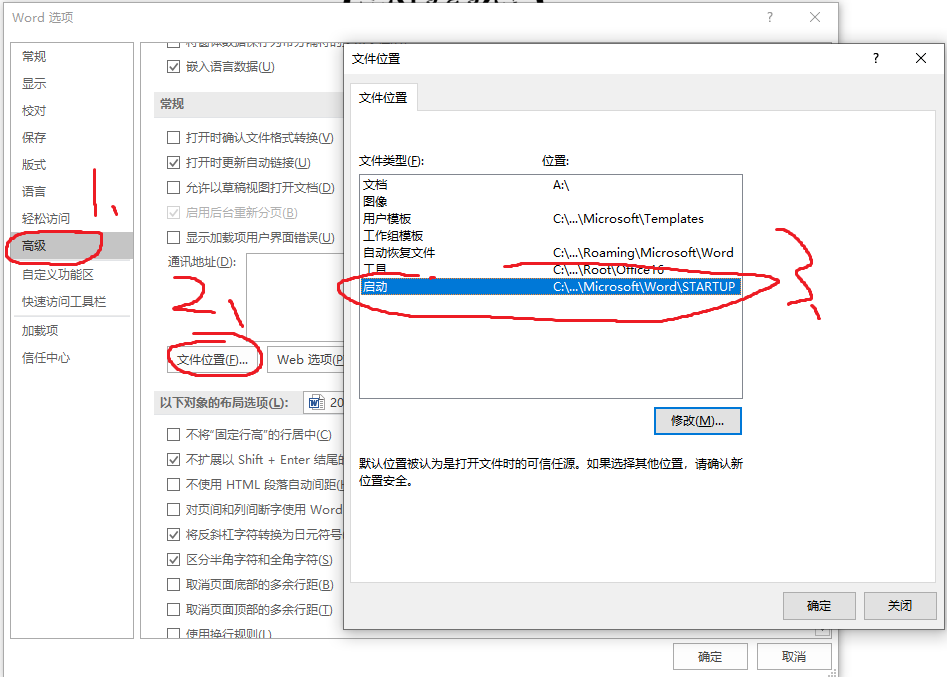
安装texsword.0.8
下载地址,复制解压后的
texsword.dotm文件到C:\Users\Administrator\AppData\Roaming\Microsoft\Word\STARTUP。(可以在word中查看上述路径)
重启word即可使用,点击加载项tex,编辑你的latex代码,然后
RUNLatex即可
代码示例:
1
2
3
4
5
6
7
8
9
10
11
12
13
14
15
16
17
18
19
20
21
22
23
24
25
26
27
28
29
30
31
32
33
34
35
36
37
38
39
40
41
42\documentclass{article}
\usepackage{multirow}
\usepackage{algorithm}
\usepackage{algpseudocode}
\usepackage{amsmath}
\usepackage{geometry}
\usepackage{algorithmicx}
\usepackage{algpseudocode}
\renewcommand{\algorithmicrequire}{\textbf{Input:}} % Use Input in the format of Algorithm
\renewcommand{\algorithmicensure}{\textbf{Output:}}
\pagestyle{empty}
\begin{document}
\begin{algorithm}[h]
\caption{algorithm1}
\label{your label}
\begin{algorithmic}[1]
\Require
Enter .....;
\Ensure
Outpur......
\State state1......
\State state2......
\State state3......
\While{(a$>$b)}
\State state4......
\If { c$<$d}
\State state5......
\Else
\State state6......
\EndIf
\State state7......
\EndWhile
\For{aaa}
\State state8......
\EndFor
\end{algorithmic}
\end{algorithm}
\end{document}效果如图所示:

office全家桶
安装office全家桶+visio,此处安装的都是2019专业增强版(建议先安装visio再安装office)。